- Published on
Data Engineering Zoomcamp | Week 2.4 Configuring GCP for Mage |
For this blog, it makes most sense to provide the video link that I'll be following:
https://www.youtube.com/watch?v=00LP360iYvE&list=PL3MmuxUbc_hJed7dXYoJw8DoCuVHhGEQb&index=23
I will also provide high-level instructions for reference. Also, if you're using a virtual machine to run Mage on (like me) I'll provide an alternative step compared to the youtube video.
Introduction
In this module, we'll set up Google Cloud components so Mage can read and write data to both Google Cloud Storage and Google BigQuery. The rest of the tutorial will focus on Mage, but first, we'll handle the Google Cloud setup.
Create GCP Bucket
- Create a Google Cloud Storage Bucket:
- Search for Google Cloud Storage and go to the Buckets section.
- Create a new bucket, naming it uniquely (e.g., Mage Zoom Camp Matt Polymer 3).
- Select multi-region and
enforce public access prevention. - Confirm and finalize the creation.
Create Service Account
Create a Service Account:
- Search for and go to Service Accounts in the IAM & admin section.
- Create a new service account named
mage-zoom-camp(for instance). - Assign the owner role to allow full access to Google Cloud resources.
- Note: if this role is just for the tutorial. In practice, we'll need to identify the exact permission required for access.
- Finish the setup and generate a JSON key file, which will be downloaded to your computer.
Add Service Account Key to Mage:
- Place the downloaded JSON key file into your Mage project directory.
- Note: if you're using a VM and downloaded this on your local machine. I'd advice using SFTP. If you've setup your virtual machine using SSH and a config file, this is a straight forward as saying SFTP
{**hostname from config file**}
- Note: if you're using a VM and downloaded this on your local machine. I'd advice using SFTP. If you've setup your virtual machine using SSH and a config file, this is a straight forward as saying SFTP
- Define the volume in the Docker file so the credentials are available in Mage.
- Recall in the
docker-compose.ymltwo services were created. One was Mage and one was Postgres. Inside the Mage services configuration, there was a volume mounted like so:.:/home/src. This means that anything any inside this directory is pulled and read into Mage. Therefore, this is the location we need to move the credentials file.
- Recall in the
- Place the downloaded JSON key file into your Mage project directory.
Authentication
- Authenticate with Mage:
- Open Mage i.e. navigate to
localhost:6789, and go to the IO config. - Choose the method to authenticate with the service account key file path.
- Ensure the correct path is provided, so Mage can use these credentials to interact with Google Cloud.
- Open Mage i.e. navigate to
BigQuery and Google Cloud Storage Testing
Test BigQuery:
- Switch to BigQuery in your Mage pipeline configuration.
- Run a simple query to ensure it connects and retrieves data from BigQuery.
Test Google Cloud Storage:
- Create an example pipeline that processes and saves a CSV file locally.
- Upload this file to your Google Cloud Storage bucket.
- Configure a data loader in Mage to read this file from the bucket and ensure it loads correctly.
With these steps completed, Mage is set up to interact with both Google Cloud Storage and BigQuery, allowing for the creation of complex data pipelines in future modules. Stay tuned for the next video where we'll build these pipelines.
Running Checks
Service Account File Present?

Note the path is the mounted path in from the host machine of the docker container.
Testing connection to GCP
1. Check we can connect to BigQuery.

I selected BigQuery, dev, and use raw sql. For my connection, profile, and option respectively. After running the block, you will see in the output if you can connect. In my case, it was successful.
2. Check we can connect to GCS storage for I/O operations:
Read data into mage from GCS:
- Upload any CSV to GCP through the console itself.

Here I've highlighted two pieces of information that we'll need to use in order to read this CSV into Mage. One is the
bucket_nameand the other isobject_key.- In Mage create a
data loaderblock. Configure it as a Python block and select Google Cloud Storage. This will provide us with the template we need:


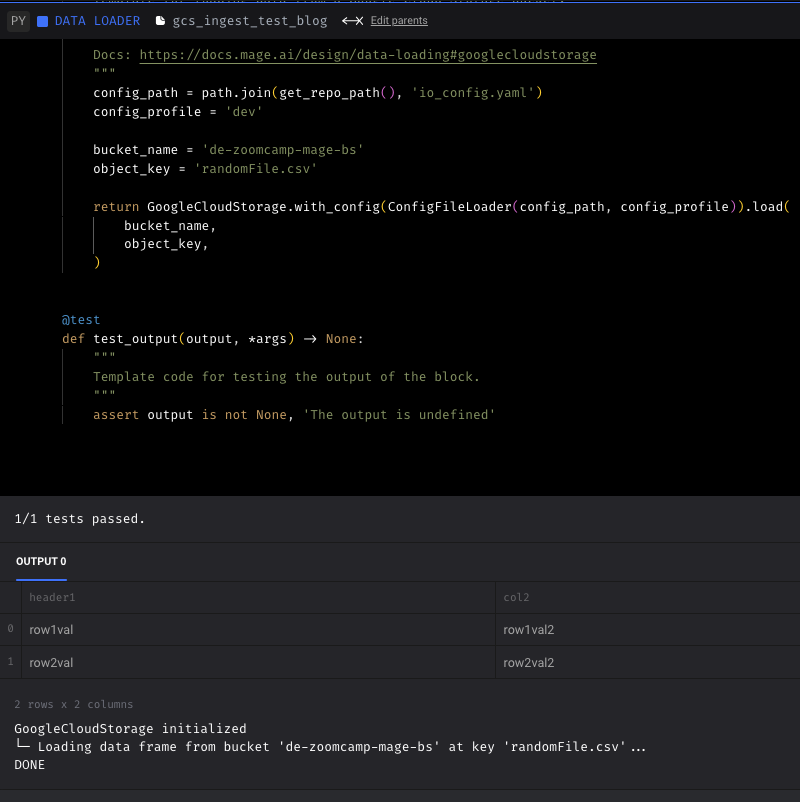
All I needed to do was supply the
bucket_name, theobject_key, and change the profile todev. It successfully read my test file into Mage!Load data from mage to GCS
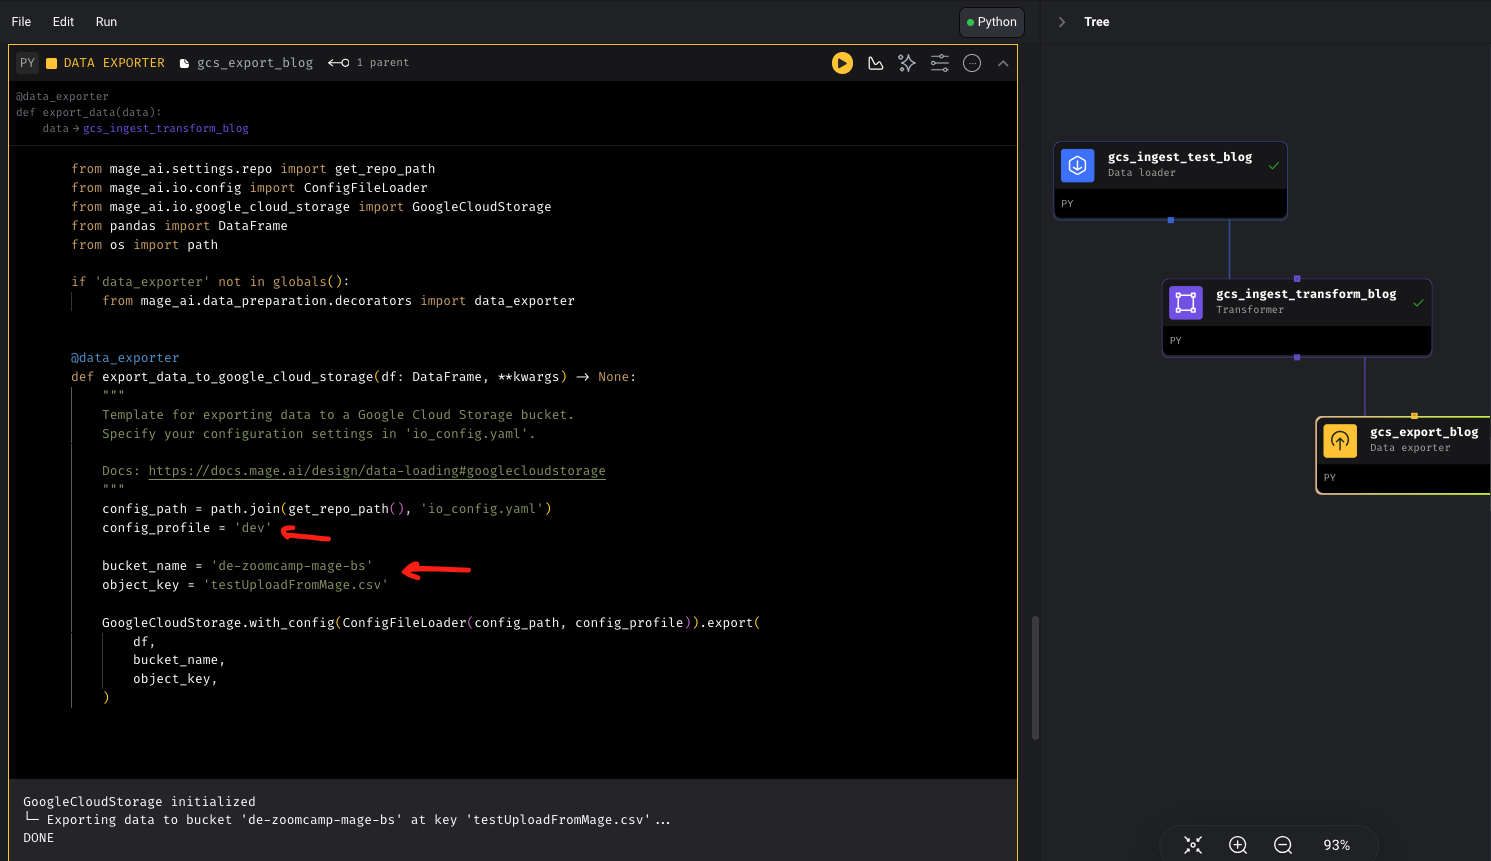
- Let's take the existing block, add a column, and then write it back to GCS. To do this, we'll add a
transformerblock, connect it to the block we've created, and then configure it to add a column. Lastly, we'll create adata_exporterblock and write out to GCS:


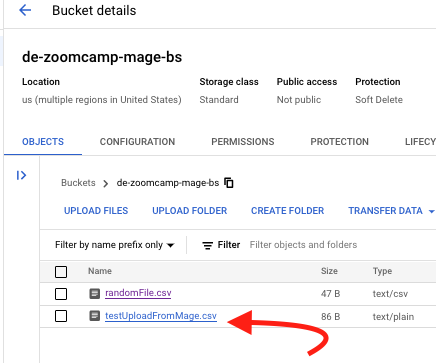
In the pictures above you can see the configuration of each step. In the output of the data loader and in GCS we can see a file was successfully created! This means we can access GCS for I/O and we can also access BigQuery 😌.
I'll catch you in the next blog where we'll be performing ETL: API to GCS. We'll level it up by partioning our data and writing out multiple files simultaneously into GCS!